

These protein peanut butter cups taste like Reese, so you’ll never guess that they have extra protein in every bite! (Don’t worry; they don’t look like protein powder at all.)
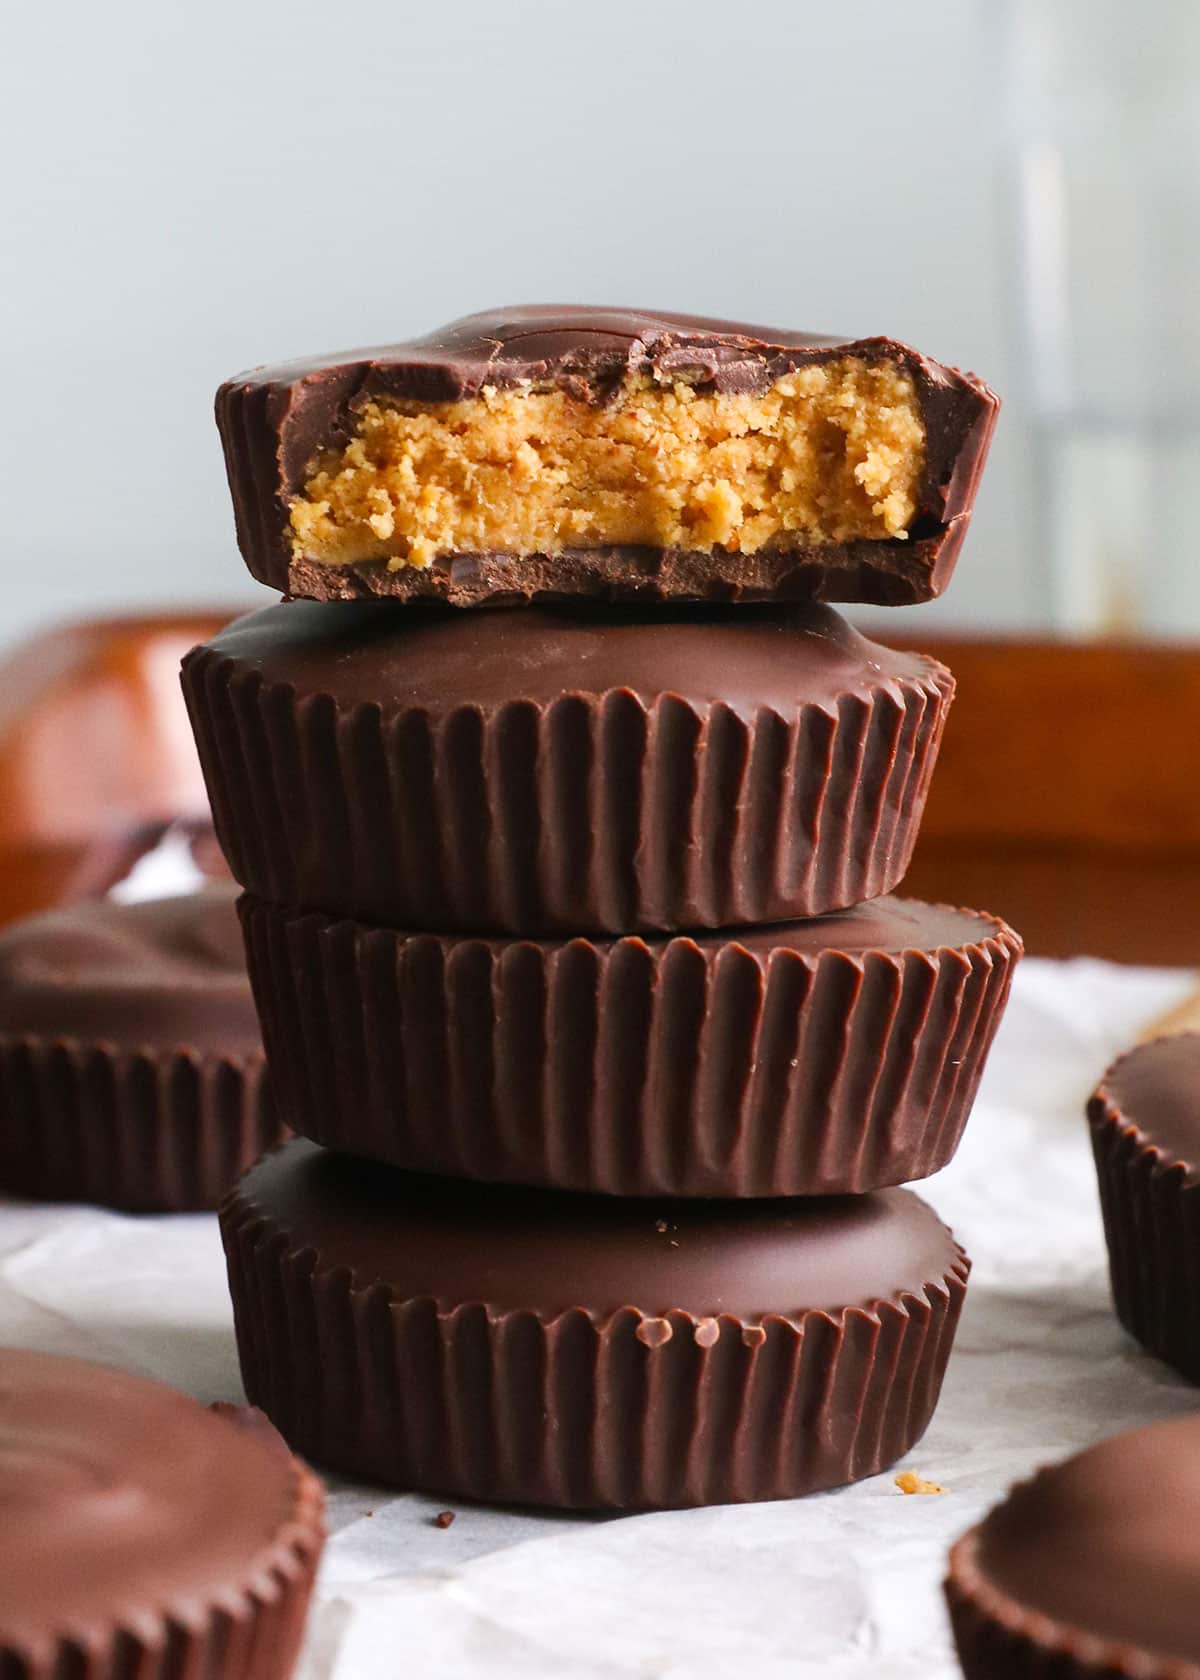
These Reese-imitating cups are a dessert that is perfect for dining. They have a satisfying flavor and texture and will satisfy you as they have 9 grams of protein per cup.
This recipe is naturally gluten-free and can be dairy-free when you use allergy-friendly chocolate chips. After tasting these protein PB cups, you will always want to keep one in the refrigerator!
Protein PB cup ingredients
Inspired by the chocolate peanut butter bars we have made over the years, this baked-free dessert-free peanut butter center is filled with protein powder (collagen in this case) instead of almond flour or coconut flour.
You can use any other nut butter you like, such as almond butter or cashew butter. Alternatively, use sunflower seed butter without nuts.
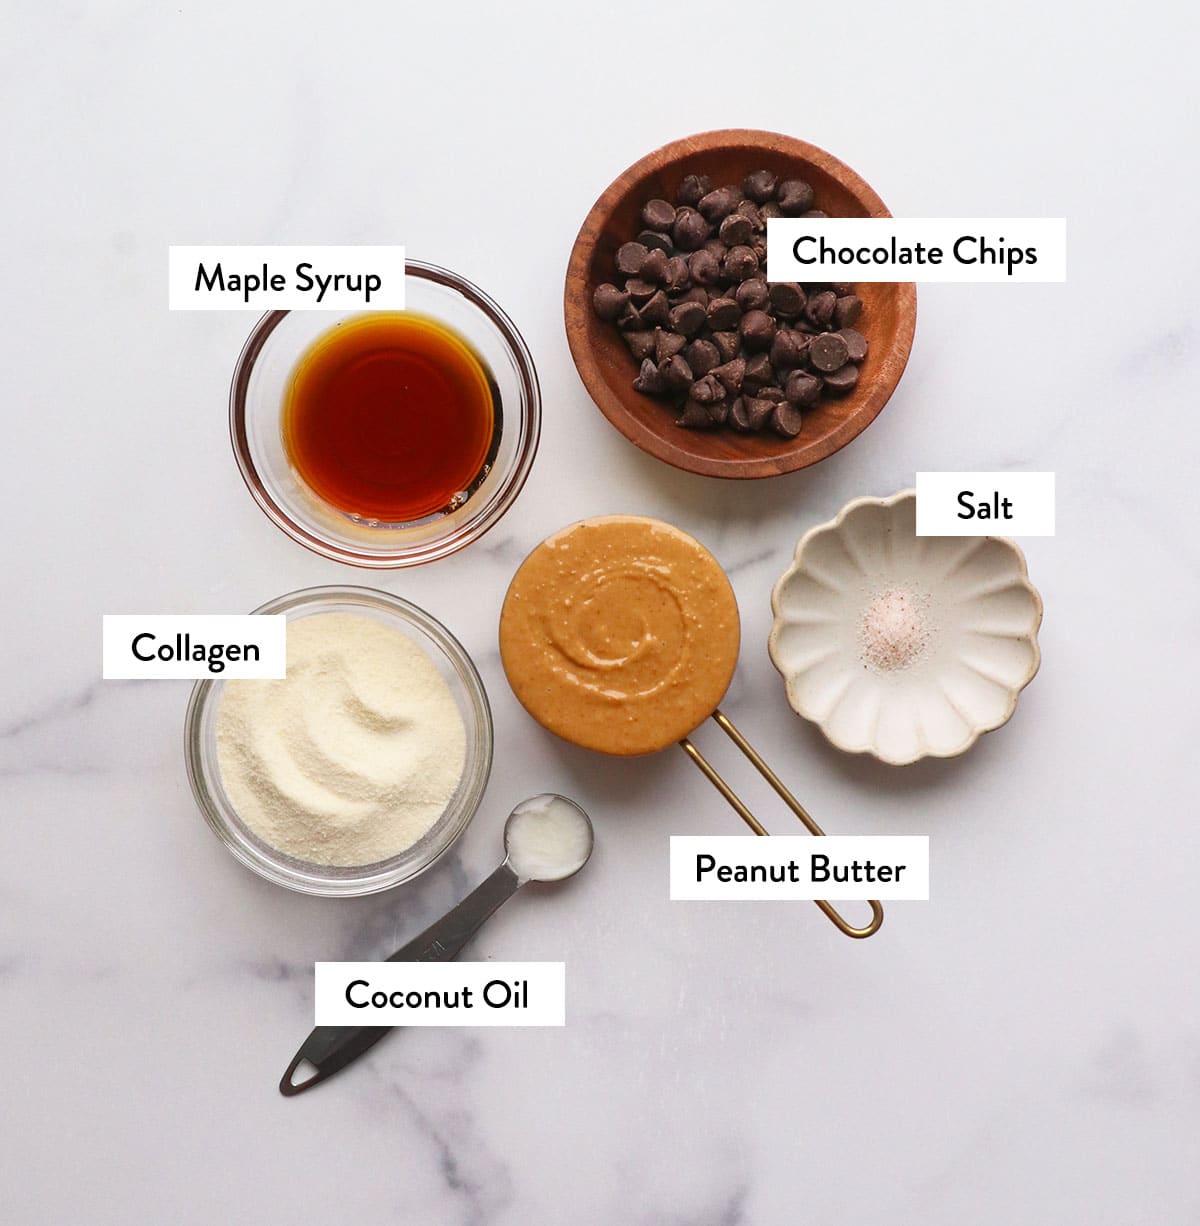
My kids (older to understand better) thought these tastes better than the store-bought versions, so they were totally victorious. Depending on how sweet you want them to be, use semi-sweet or dark chocolate chips.
Protein powder
You may be able to use whey protein or plant-based protein in it, but if you are experimenting, always Start with just one tablespoon See how texture and taste affect.
Conventional protein powders are chalky and may affect taste and texture. On the other hand, collagen fuses together!
How to Make Protein Peanut Butter Cups
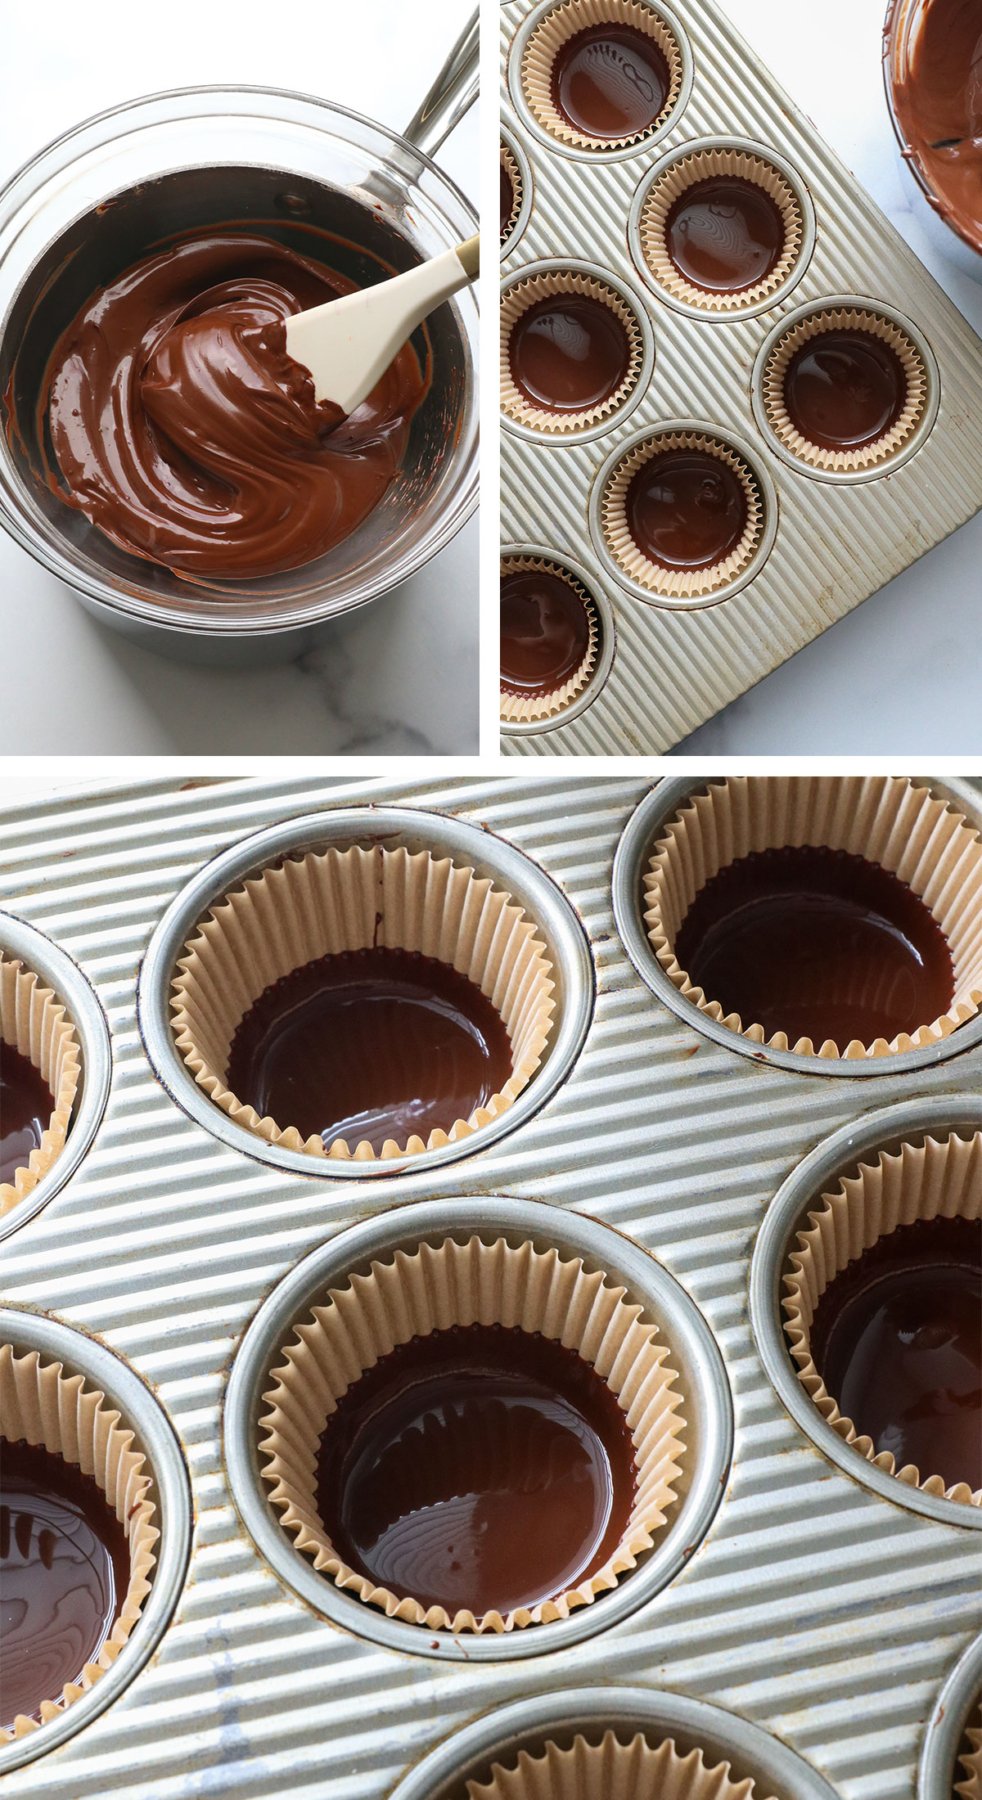
Line up muffin tin with 9 sheets of paper or silicone muffin liner. Mix dark chocolate chips and coconut oil in a hot cake, the bowl fits on a small pan. Add an inch of water to the pan and boil it on top of the stove.
After the water boils, place a hot-protected bowl filled with chocolate chips on top of the pan. Stir until the steam melts the chocolate gently. Coconut oil dissolves and dilutes the texture, causing it to pour in.
Another way to melt chocolate
Also, you can use the microwave to melt the chocolate at 30-second intervals. This method does not melt the chocolate evenly and does not keep melting when placing the bowl on a hot pot of water. Therefore, the above mentioned dual boiler method is the preferred method.
Add 2 teaspoons of melted chocolate to each muffin liner. Then, tilt the pan to rotate the chocolate around the lower edge of each cup. Place the pot in the refrigerator for 10 minutes and allow the chocolate set.
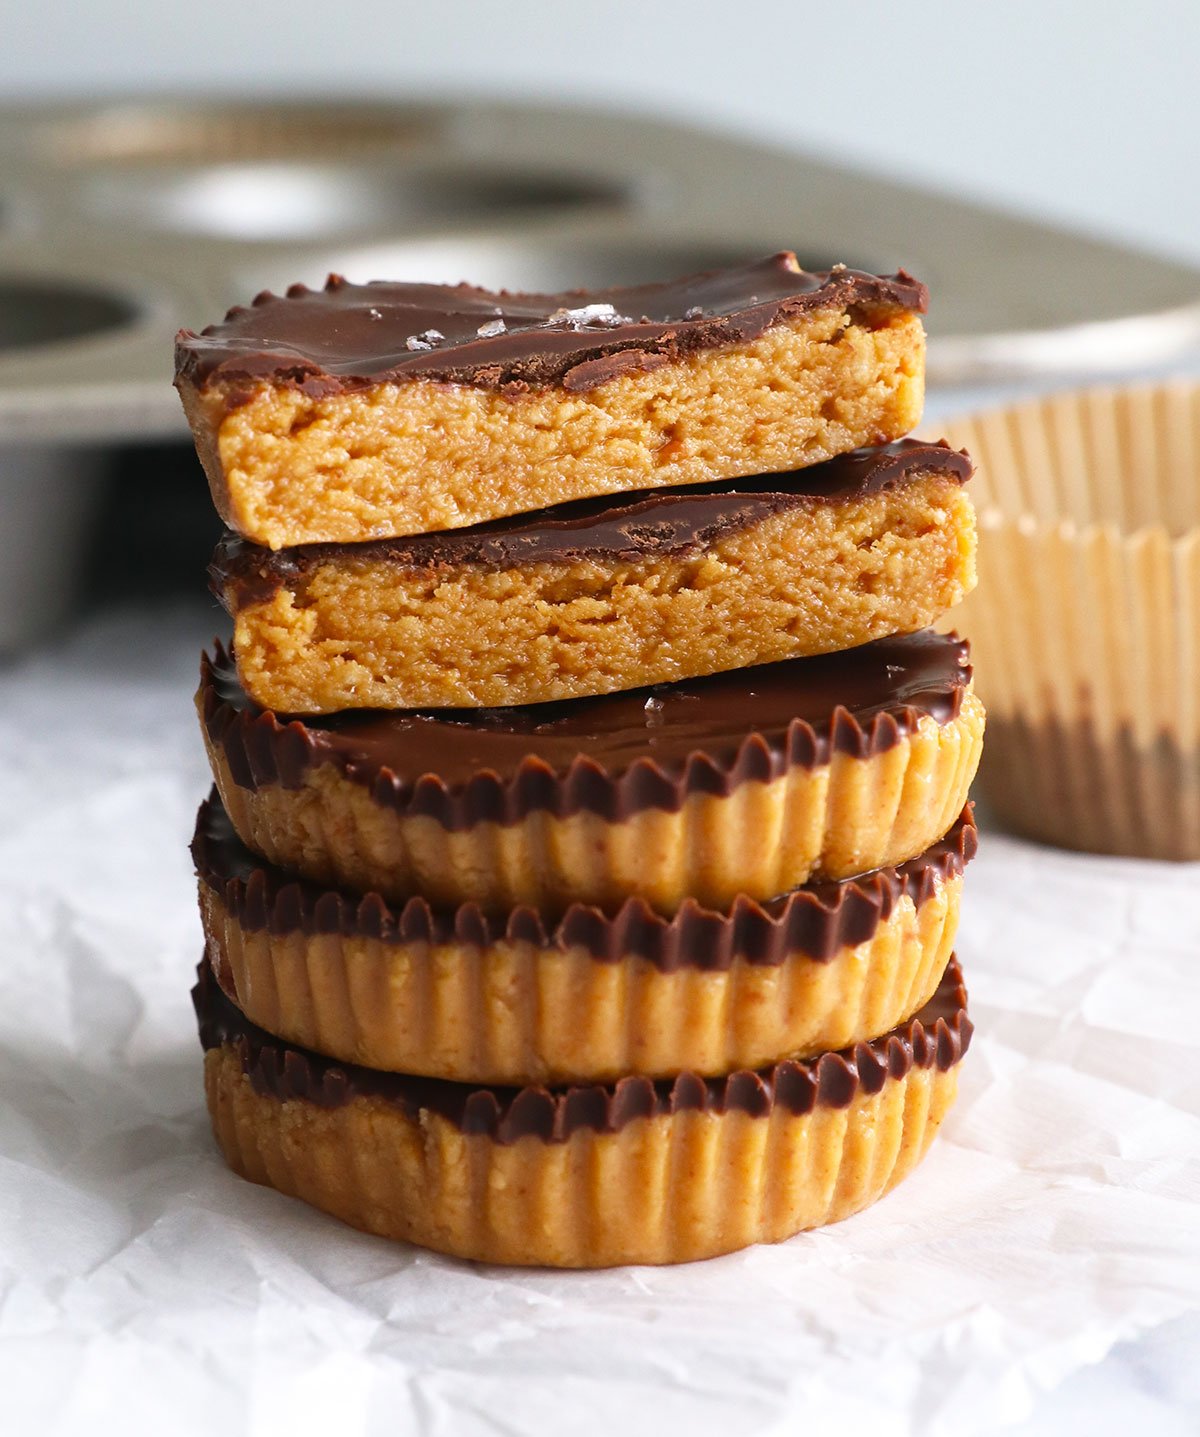
Meanwhile, add all natural peanut butter, collagen, maple syrup and salt to a medium bowl. Stir well until the mixture looks like a moist cookie dough. (You should be able to roll it into a ball like Play-Doh.)
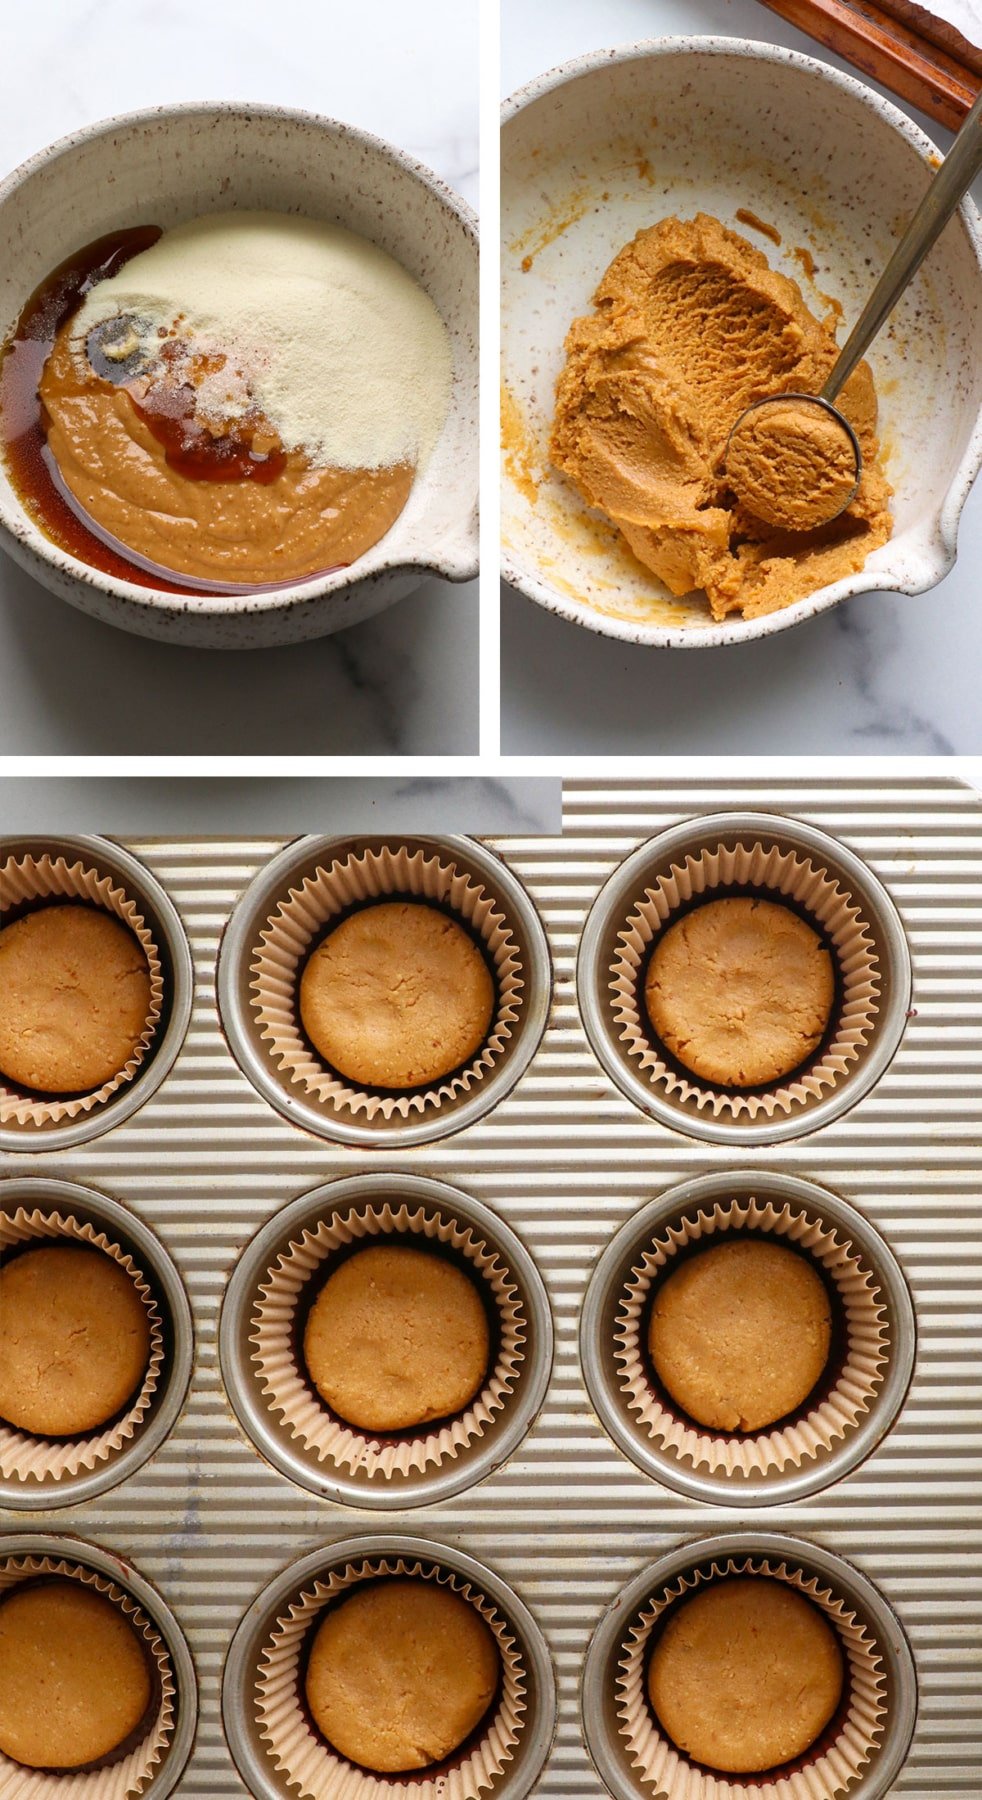
Remove the pan from the refrigerator and add a tablespoon of peanut butter mixture to the center of each cup. Slightly flatten the peanut butter layer, leaving some room around the edges of each muffin cup so the chocolate can cover the edges.
After using all the peanut butter mixture, add another 2 teaspoons of melted chocolate to the top of each cup. It should completely cover the top and edges of each muffin cup.
Sprinkle flakes of sea salt on top if needed.
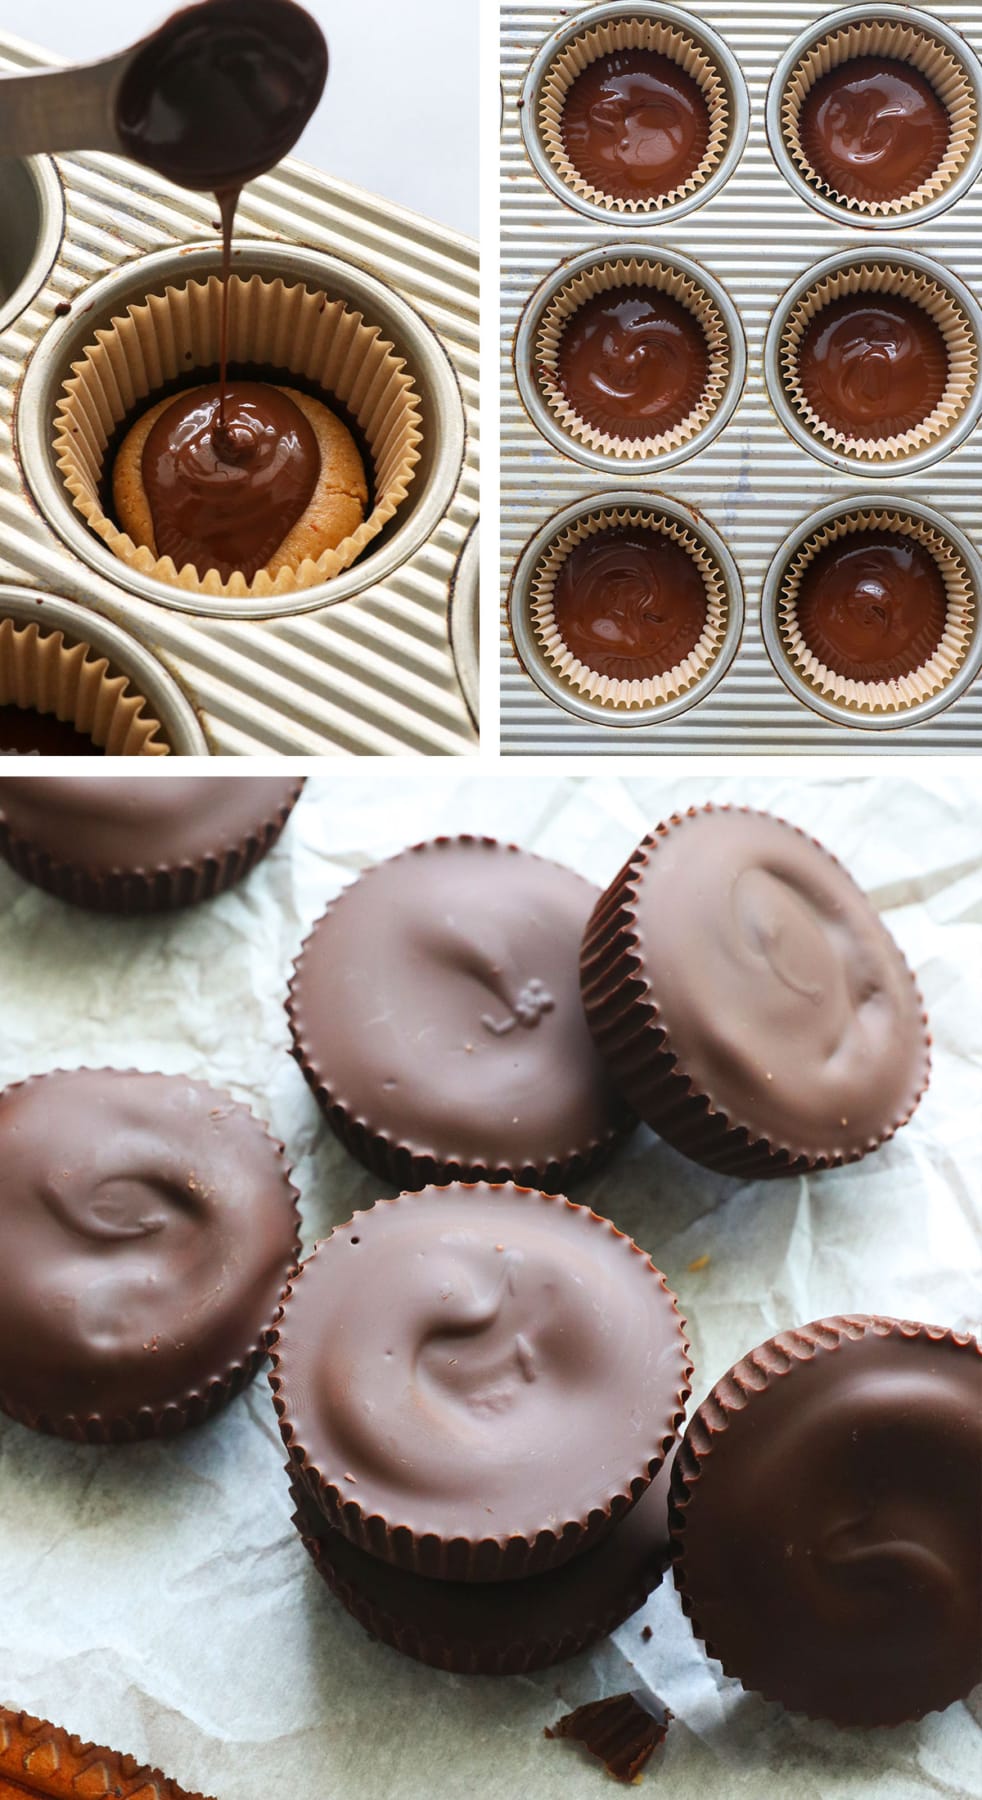
Return the muffin pan to the refrigerator until the chocolate is firm. Then these are ready to enjoy! Since coconut oil has been added to the chocolate, these snacks may melt at room temperature.
Store them in an airtight container in the refrigerator for up to a month and enjoy the best texture of refrigeration. (They don’t last for a month and then eat them again… if they last for 3 days, we’re lucky!)
Low calorie options
You can use less chocolate by simply adding chocolate to the top of each peanut butter cup, thus reducing calories. (Skip the bottom and sides.)
Looking for more high-protein desserts? Try protein brownies, easy protein balls or cheese ice cream.
-
Translate the standard muffin pan with 9 parchment lined. To melt the chocolate, add an inch of water to a small pot and bring it to a boil. In a hot-protected bowl that fits on the top of the pan, add the chocolate chips and coconut oil. The steam under the bowl will gently melt the chocolate. Stir occasionally until smooth. The coconut oil will be thinner, so it is easier to pour in.
-
Add 2 teaspoons of melted chocolate to each muffin liner. Then gently tilt the pan on each side so the chocolate starts covering the lower edge of each muffin cup. (This will help create beautiful edges, but optional.) Place the pan on a flat plate in the refrigerator when working next.
-
In a medium bowl, mix together peanut butter, collagen, maple syrup and salt. Stir well until the dough looks even. Then, remove the pan from the refrigerator and scald a tablespoon of peanut butter to the center of each muffin cup.
-
Gently level the top of each peanut butter mound with your fingers, making it easier to cover the chocolate. If the peanut butter is all the way to the edge of the muffin cup, then the chocolate can fill the sides, which is ideal. Pour 2 teaspoons of melted chocolate mixture over the top and spread it evenly with the back of the spoon. Sprinkle flakes of sea salt on top if needed.
-
Place the pot in the refrigerator to securely. Once they are solid (about 10 minutes or so), they can enjoy it. Transfer to an airtight container to retain its flavor and store it in the refrigerator for up to 1 month. Exudes the best texture; if they warm up too much, they can melt in your hands.
Want to have a vacation? Turn this recipe into a peanut butter heart or peanut butter egg. (See the linked post for a photo tutorial.)
Chocolate Chip Note: Using 3/4 cup chocolate chips will give you 9 items you need. (You will scrape the bowl at the end to use the last drop of the bowl.) If you want to go with extra chocolate, use 1 cup of chocolate chips instead.
Low calorie notes: For lower calorie snacks, you can reduce dark chocolate chips to just 1/4 cup. In this case, you can only apply the top of each peanut butter cup. (Not the bottom and sides.)
Free notes: This recipe is dairy-free when you use allergy-friendly chocolate chips (such as enjoying a lifestyle brand).
Calories: 208KCAL | carbohydrate: 13g | protein: 9g | Fatty: 14g | Saturated fat: 6g | Polyunsaturated fat: 2g | Monounsaturated fat: 6g | Trans fat: 0.004g | cholesterol: 0.4mg | sodium: 46mg | Potassium: 194mg | fiber: 2g | sugar: 8g | Vitamin A: 6IU | calcium: twenty threemg | iron: 2mg
If you try these peanut butter egg white cups, Please leave a comment and a star rating below Let me know you like them.


